> For the complete documentation index, see [llms.txt](https://radiantblockchain.gitbook.io/wiki/llms.txt). Markdown versions of documentation pages are available by appending `.md` to page URLs; this page is available as [Markdown](https://radiantblockchain.gitbook.io/wiki/guides/electron.md).
# Electron Wallet
## FIRST USE - ELECTRON WALLET
The Electron wallet is recommended for general receiving and sending uses. It uses Electrumx as to connect to the Radiant node.
What you will see in this guide:
* Downloading Wallet
* Seed generation for the wallet.
* Basics for sending and receiving.
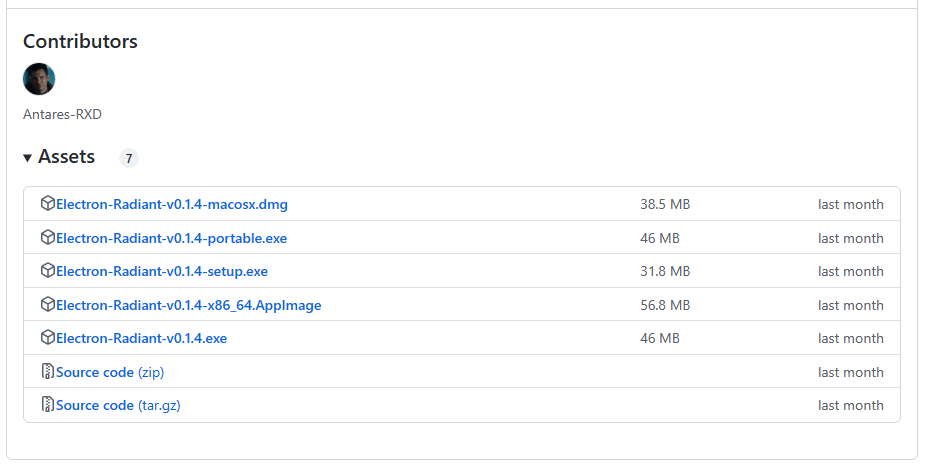
### Download the wallet
URL:
For this guide I recommend the portable version because it does not require installation. This allows you to move it to another pc or make a backup in a simple way.
* **MACOS:** Electron-Radiant-v0.x.x-macosx.dmg
* **WIN PORTABLE:** Electron-Radiant-v0.x.x-portable.exe
* **WIN INSTALL:** Electron-Radiant-v0.x.x-setup.exe
* **LINUX PORTABLE:** Electron-Radiant-v0.x.x-x86\_64.AppImage
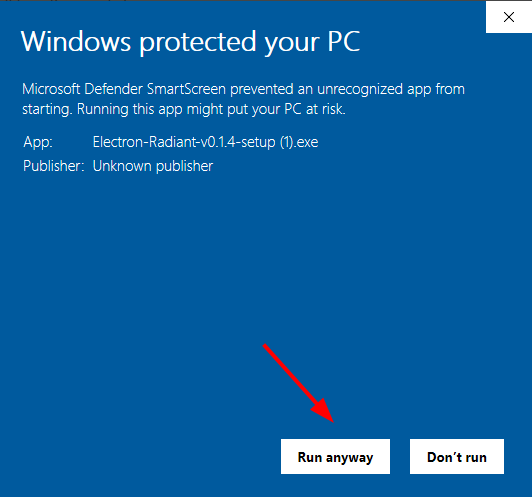
The first time it is run, it will be necessary to accept the Windows warning. It is also possible that the antivirus says that it may have a Trojan, but it is a false-positive.
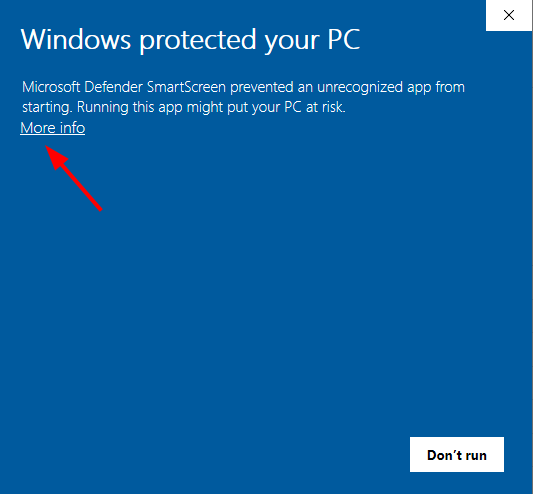
And click in Run anyway
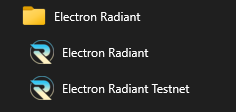
Two icons appear in the installation. The standard version, which is the **Mainnet** and the **Testnet**, which is the testnet network.
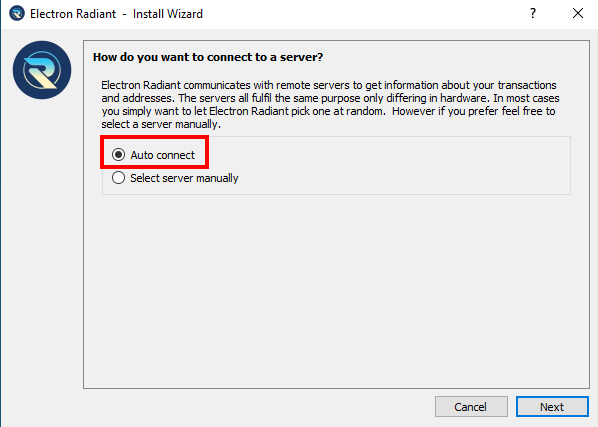
The next step is to indicate how to connect the wallet. By default it is correct
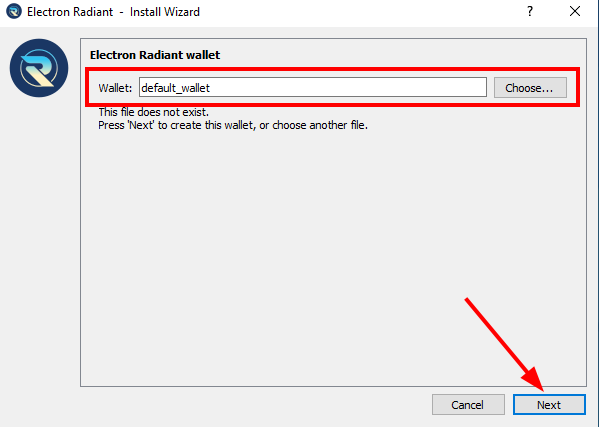
Now it is time to create a new wallet and it is necessary to give it a name. To load a backup, it would be necessary to load the file of the wallet
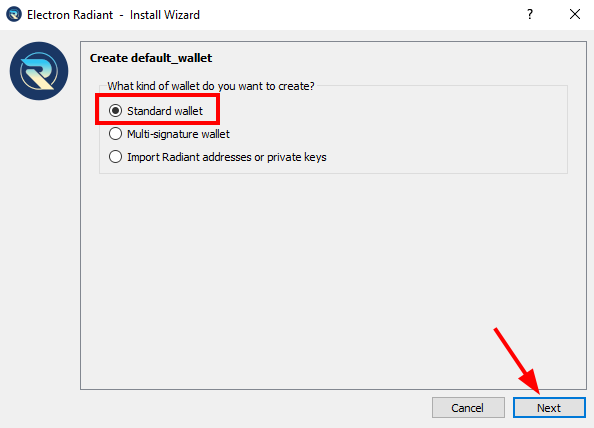
Radiant only works with standard wallets, which is the one to dial. To retrieve a specific private key, it would be option 3
### Create new seed
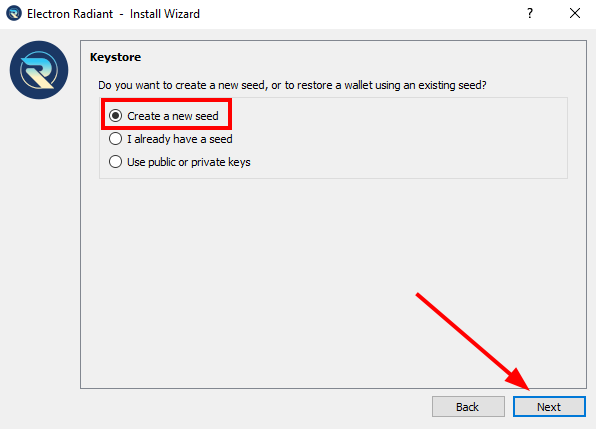
In the next step we have two important options to choose from. Restore a wallet with the saved words or generate a new one.
In this case we select a new one:
1. Create new seed
2. Restore seed.
The words that appear will be the seed of the new portfolio. It is necessary and obligatory to write them down or copy them to a file. If they are lost, you will lose access to any radiant in the addresses of the portfolio.
**IMPORTANT: MAKE SEVERAL BACKUP COPIES OF THESE WORDS**
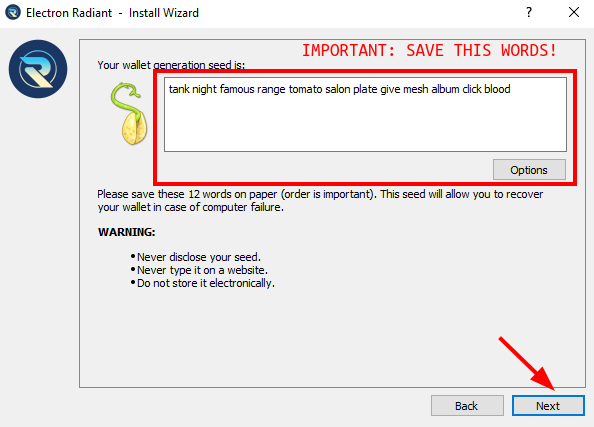
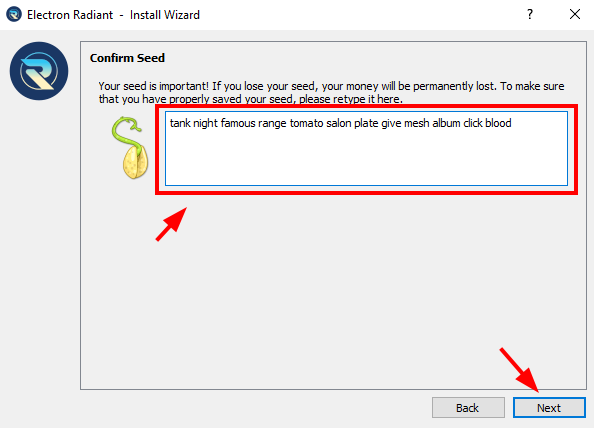
To ensure that the words are copied correctly, you are asked to enter them all in the following step
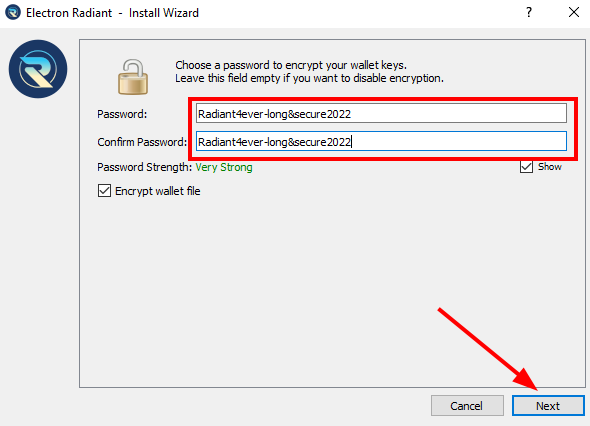
And the last step is to generate a password that encrypts the wallet.
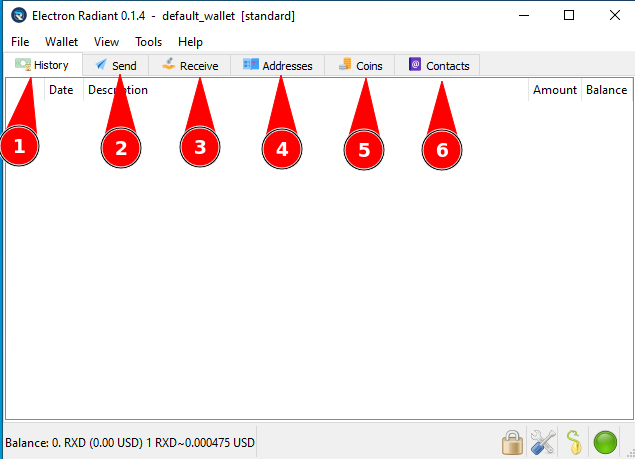
### TAB Options
| TAB | Description |
| ------------ | --------------------------------------------------------------------- |
| 1. History | All transactions from all addresses |
| 2. Send | To send coins to an address |
| 3. Receive | Address to receive coins and it will always be an unused one. |
| 4. Addresses | The first 20 seed directions. All are valid for receiving and sending |
| 5. Coins | The UTXO of each reception |
| 6. Contacts | Addresses targeted for reuse |
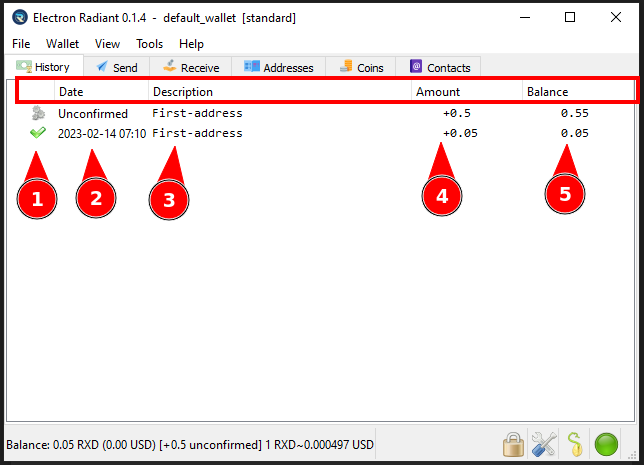
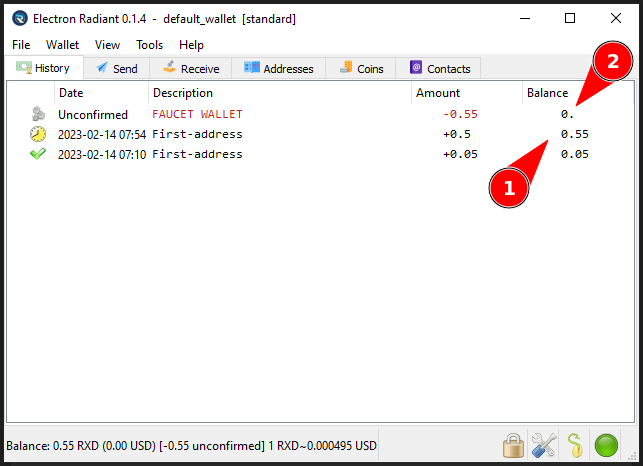
#### History
1. Status of TX.
2. Transaction date.
3. Address label.
4. Amount of RXD of the transaction.
5. Overall balance of the transaction.
#### Send
1. Destination address
2. Name of the address.
3. Send button.
4. Bar to establish network commission.
5. Amount to send
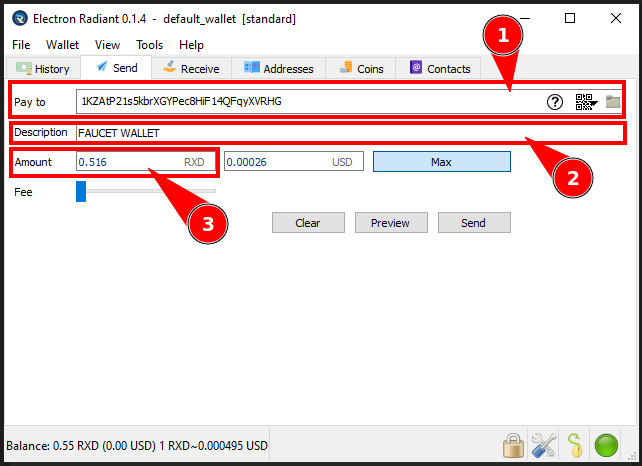
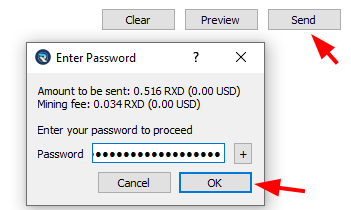
If you have entered a password in the wallet, you need to enter it to make a transaction.
Once everything is filled in correctly, the transaction is displayed.
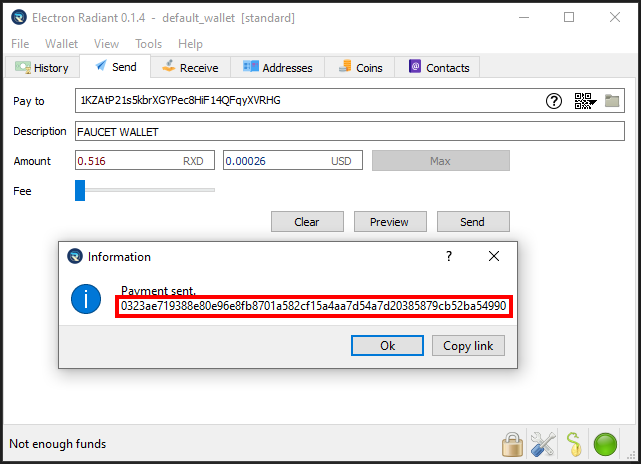
In history appears this transaction as shown in the image and the transaction will appear in the next block that is generated (about 5 minutes).
1. Coin input
2. Coin output
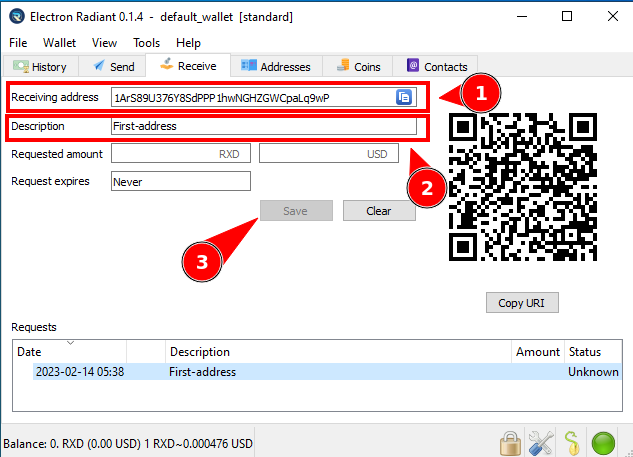
#### Receive
Address not used to receive new funds
1. his address will always be one that has never received funds.
2. Name to be added to the address
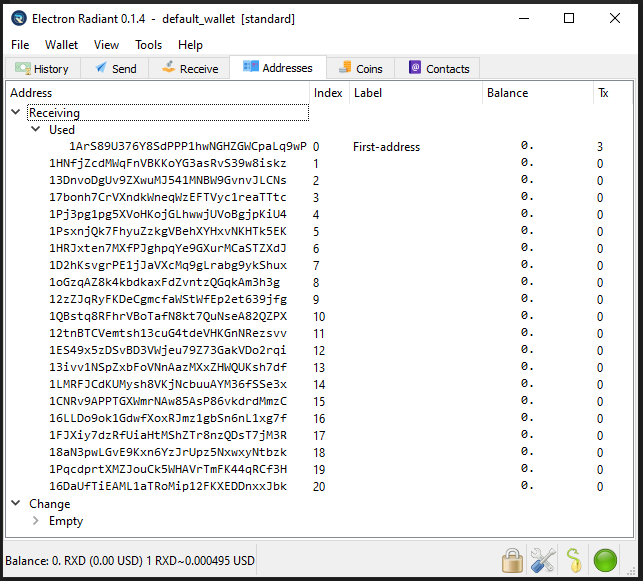
#### Addresses
The first 20 addresses of the wallet and the amount of coins in each one. In change
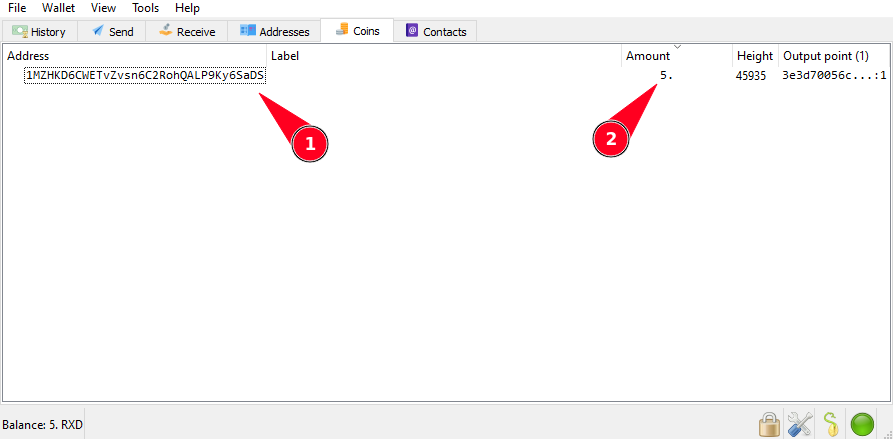
#### Coins
**Here you can see all received and unspent transactions.**
1. Addresses to receive
2. Number of coins per address
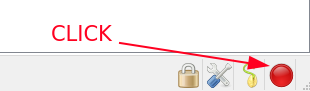
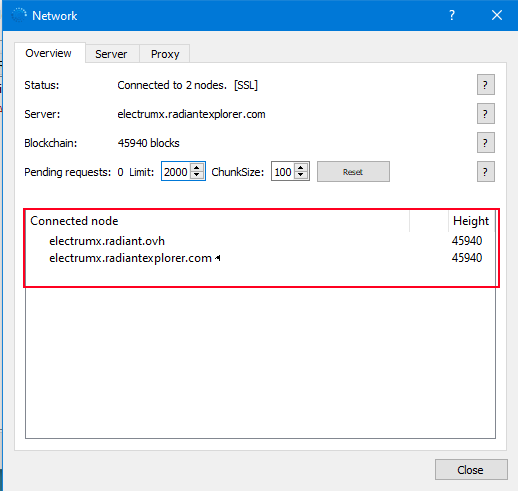
If the connectivity button is red, you can fix it by clicking on it and checking the servers to which you are connected.
In server all servers are loaded and can be added if necessary.
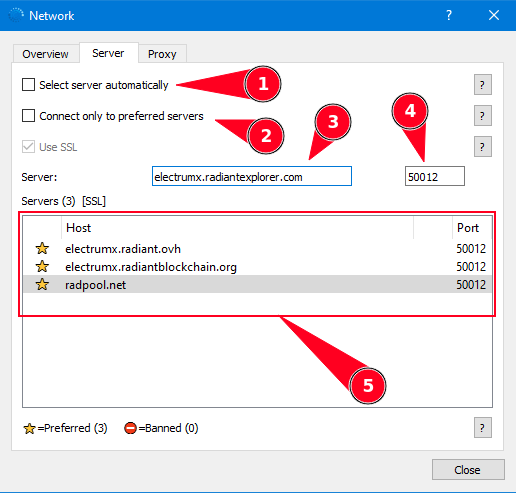
Here are the servers you can connect to
**ACTUAL SERVERS**
```
electrumx.radiant.ovh 50012
electrumx.radiantexplorer.com 50012
electrumx2.radiantexplorer.com 50012
electrumx.radiantblockchain.org 50012
electrumx.radiant4people.com 50012
```
---
# Agent Instructions
This documentation is published with GitBook. GitBook is the documentation platform designed so that both humans and AI agents can read, navigate, and reason over technical content effectively. Learn more at gitbook.com.
## Querying This Documentation
If you need additional information that is not directly available in this page, you can query the documentation dynamically by asking a question.
Perform an HTTP GET request on the current page URL with the `ask` query parameter, and the optional `goal` query parameter:
```
GET https://radiantblockchain.gitbook.io/wiki/guides/electron.md?ask=&goal=
```
`ask` is the immediate question: it should be specific, self-contained, and written in natural language.
`goal` is optional and describes the broader end goal you are ultimately trying to accomplish on behalf of the user. GitBook uses it to tailor the answer towards what is most useful for that goal.
The response will contain a direct answer to the question and relevant excerpts and sources from the documentation.
Use this mechanism when the answer is not explicitly present in the current page, you need clarification or additional context, or you want to retrieve related documentation sections.